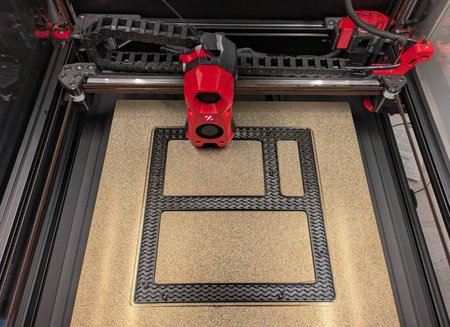
It all started with my Creality Ender 3 V2, which was starting to infuriate me because of it’s state. The printer barely worked because of all the “upgrades” that I have done to it over the two years when I was still at school. I really didn’t have much money in that period of time, so I just tried to upgrade it with little money as I could. And that backfired at me. I used incompatible parts with the Hero Me V6 duct and also I had it printed in PETG and PLA, which cracked and melted a lot over time, making it less reliable. I had to deal with breaking parts often. And that made my printing experience pretty unenjoyable.
HERE WILL BE THE PICTURE OF ENDER (dont have it rn qwq)
Now that I have a job and live on my own, I have decided to upgrade to much better 3D printer. First I wanted to go small, and get something like newer Ender or Elegoo. But then I just thought that Voron would me really fun and good for me. It is definitely a flex to have, and building it yourself is pretty fun. I didn’t want to get a Bambu Lab. I think that is the wrong direction for 3d printing, its just for lazy people that don’t really understand technology.
So I have decided to order a kit from Formbot for the Voron V2.4 r2 with 350mm build plate. So I could print way more and bigger models with it. I have impatiently waited for it whole week and half, because the kit came with already printed ABS parts. But then I got an email that the guy did a mistake, and the kit that I have ordered was not in stock. Luckily he offered to give me the FYSETC kit instead which should be higher quality and more liked. I agreed and waited another couple days for the package to arrive. In the mantime I have began to prepare the things needed for the build. I bought a square, loctitte, metal ruler and linear railing lube. Well, the lube was actually meant for cars, but I suppose that works well too.
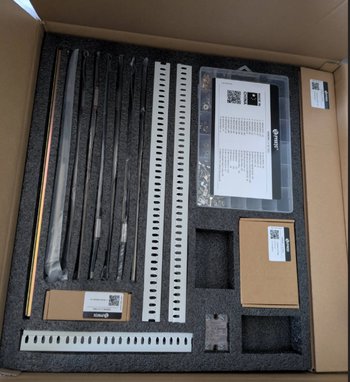
After the kit arrived, I had an issue with trying to get the box home. I chose to get the kit sent to nearby Packeta supported store. I had help tho, we took turns in carrying it.
This is not a guide, just mentioning the most notable things.
The assembly
I was looking forward to assembling my own Voron, it is pretty notable thing to do when you are interested in 3D printing. And also it teaches a lot about how the machines work. But not only that, it also improves your motoric skills while you do it.
I unpacked the boxes and opned up the PDF guide. The assembly of the frame was pretty straight forward. All I had to do was follow the guide and make sure that all extrusions are squared. I didn’t have any reliable flat surface for that, but I had the 350mm build print bed which should be milled pretty well. I mounted the four linear rails for the Z-Axis, but I greased them up before that. I finished up the frame by mounting two perpendicular extrusions which will hold the print bed. And then the bottom plate for the electronics area.
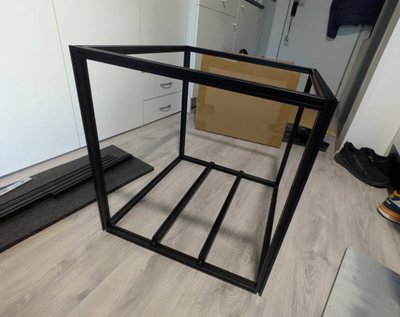
I did the bottom four feet which housed the Z-Axis motors. I had to insert brass M3 threaded inserts into 3D printed parts. This is pretty much my favorite process to do whenever I 3D print something functional. While at it, I did more parts, even for the gantry to save time. And of course, I used the loctitte thread locker to secure the screws in moving parts.
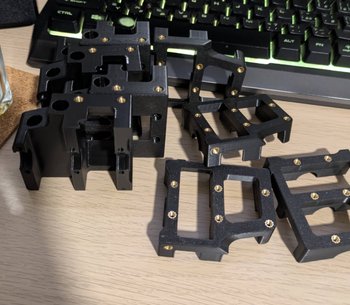
Assembling the gantry was more tricky. I had to make sure the parts are seated together well, and that extrusions are square. I had to put on the linear rails and put a perpendicular Y-Axis extrusion on the linear rail carts. I messed it up by accidentally putting stepper motors for Z axis on the AB drives instead of the specific AB motors. Another mistake was that I accidentally mounted the Y axis moving part the wrong direction, so that would mean that the printhead would face wrong direction.
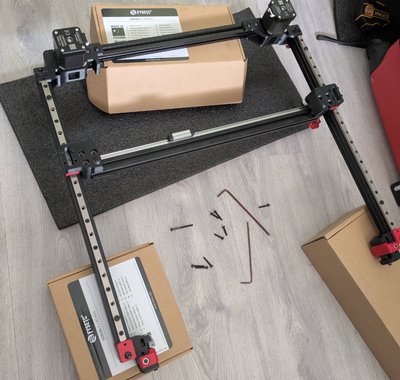
I also spent like 2 hours solely trying to figure out how to assemble the CNC Fysetc Voron tap printhead holder because I couldn’t find any guides anywhere. Everything I found online was for different models. I figured it out eventually.
Belting
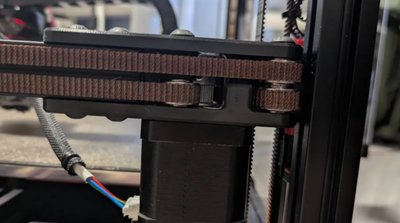
This was the most annoying part of the entire build. It was so nerve wrecking I had to take several breaks trough the process. The Z axis belts were fine. I made sure the gantry is attached to the top of the frame with zip ties, so it holds hanging dowm. And then I threaded trough the belts and made sure they are well adjusted. Only issue I had was threading them trough the Z motor pulleys. I accidentally threaded two belts wrong and almost damaged the belts.

The worst part was the A and B drive belts. One thing was routing the belts correctly. I really struggled with routing trough the tensioning pulley. And other thing was making sure the belts are the same lenght and tension. That also took me a long time to get right so the printhead moves correctly. I also had to fix racking issue.
Printhead
This step was also quite annoying because of the tight space constraints. I threaded the clockwork extruder parts and assembled it. Then I did the rest of the Stealthburner. Put in the hotend, coolers and LED. I put in the CAN board which is really good so I don’t have to route so many cables trough the gantry. And yeah, the extruder motor.It was pretty annoying to close up the printhead together, mainly because of the wires blocking stuff.
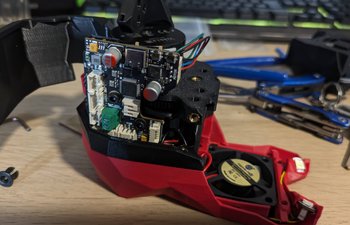
Attaching it to the gantry was pretty straight forward and simple. I just noticed an issue where I haven’t thightened the linear rail for the tap. I blame Fysetc for having bad documentation. But yeah, after a while it was done and ready.
Electronics
Next big step which I was really looking forward to, but also was a bit afraid of. I thought it will go well, but again because of Fysetc, it turned into hellish annoyance. So I started with PSU, I wired up the plug, relay, then the controller board, added Raspberry pi 4 and connected CAN board on toolhead. It all looked really good, I kinda struggled with cable managment, but by the end I think I got them well. I had to trim the fan wires because they were too long.
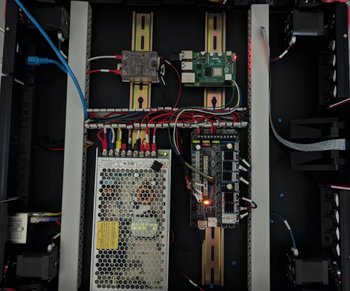
Then I had to flash firmware to the CAN and controller boards. It took me quite a longer time to figure out how to set the menuconfig options to make them both communicate together and have usable UUIDs.
Roadblock
I was about to set up the printer, I checked all end-stops if they work, setting speeds and stuff. But I was unable to move the stepper motors. I spent so much time changing configs and playing with the TMC driver stuff, I tried checking voltages and stuff but that was fine. I was so desparate, even people on the Voron Discord server couldn’t help me, but they did a great job trying to help me and they are very willing to spend time on your problems.

I replaced the whole controller board, and boom.. It still didn’t work. Then I tried to buy stepper motor drivers from some popular 3d printing eshops, but like two of them called me that they don’t have the drivers and suggested me some totally different ones that wouldn’t work for me. Finally I got some from new small eshop that was in my area. And they worked! I was so relieved that the printer finally works.
Tuning
There is nothing special about this, I think it applies almost the same to any printer. I would just say that tuning Voron was much smoother than tuning Creality Ender 3 V2 which I had before. I still have some things to do, like setting per-filament advance pressure and things like that. I am pretty content with the print quality, but there are still things that can improve, like stringing on ABS.
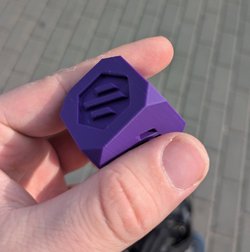
Finishing
I added some LED strips to the top of the printer and connected them to a fan port which I set a switch for in Klipper. The strips have warm yellowish tint, which is something that I really like. I hate cold neutral LED lights. I also tried to add a wiper to the back, but my toolhead cannot reach there sadly…
I still have a lot of things to do, like replacing the skirt fans for some quiter ones. Adding better cooling for Raspberry Pi and stepper motor drivers. I also have to fiddle more with Klipper macros and filament slicer settings. But I think I will eventually get to the point where I will be very content with.
